I finally have one! For a long time I wished to have one unit of the first Commodore personal computer, and the time has come! The only detail is that in my case, PET stands for Paper Electronic Transactor!
Yes, while I cannot have a real one, I am very happy to have a miniature made of paper. Here is the beauty:
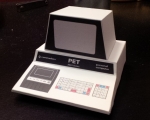
My paper model of a Commodore PET
My son was always interested in build paper models, and the Internet has thousands of thousands of everything that you can imagine to be built using paper, mostly using the software Pepakura. Seeing him having fun with something he was building I wondered if there was any paper model of Commodore computers.
For that specific software I didn’t find any, but I was able to find two Commodore paper models that you can download, print, cut and build yourself.
The first one is my PPET (Paper PET), available as free download at the German website HomeComputer Museum, and it is very
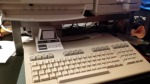
PPET hanging out with its great-grandson!
easy to assemble. It consists in three sheets of paper containing the base, the main case and the monitor.
The second model I’ve found is a Commodore SX-64, and the author, Erik Schubach, made the sheet available for free on his website: http://www.erikschubach.com/vintage/sx-64-paper-model.php. I haven’t tried this one yet, since it seems a bit more detailed, but I will build it soon.
I would recommend to print the sheets using 120g or 180g paper, so you can get a sturdier finish model. To cut the sheet I used a Xacto knife. It is also useful to make the paper to fold easier. For that, apply the knife very lightly over the lines meant to be folded. White glue is perfect for that, although hot glue is better if you know how to use it without making a mess.
If you know where to find more paper models for Commodore computers, please leave a comment. If you are talented enough, try to make a new one using the Pepakura Designer – I will be thrilled to see and try your work!

 I’ve been working on Commodore is Awesome and Vintage is the New Old websites for some time, which explains why this personal blog has not been updated properly for several months.